With simple, inexpensive DIYs on how to fix squeaky floors, you can repair a floor without the need for tearing it up or reinstalling it.
Living in a house with squeaky floors can be quite vexing, especially sneaking around at night.
Most hardwood floors and staircases are the common culprits, regardless of whether they are covered with a carpet.
Though a common phenomenon in most homes.
Squeaky floors mostly manifest after the house has settled, and the lumbar has dried out and shrunk.
The squeaks and creaks emitted as you walk across the floor are due to the floorboards rubbing against each other or sliding against the nail shaft.
Read more on how to stop a sofa from sliding on the floor
Inexpensive DIY’s On How to Fix Squeaky Floors and Staircase

1. Insert Shims into The Gaps
Silencing a squeaking floor or a staircase is way more manageable if you can access the space beneath the floor via the basement or crawl space.
Additionally, you should note; Don’t force the shim into place because it will create a wider gap between the joist and the subfloor.
- Go below the room or floor, whether you’re getting the squeaks and creaks, and another person slowly walks back and forth across the floor.
- Your main objective will be to identify the specific spot where the squeaks are coming from, and as soon as you hear a squeak, ask the person to stop and step down on the exact location again.
- Once you have identified the exact spot, use a flashlight to check if there’s a gap between the top of the floor joist and the subfloor’s underside.
- Note: you may have to remove some insulation to get a clear view.
- If you happen to get a gap, no matter how small—spread some carpenter’s glue onto a thin wood shim and push it into the opening.
- It’s advisable not to hammer in the shim and not to it in too far, the reason behind this being that you might accidentally raise the subfloor, creating a hump in the floor above.
- The sole purpose of inserting the shim is to fill the void and prevent the floor from moving up and down, which will often silence the squeak.
- If you happen to identify several squeaking spots, you can repeat the process above and be sure to inspect both sides of the joist; sometimes, the gap is only visible on one side of the joist.
- Once the glue has dried completely, trim the shims flush with the joists by first scoring them with a utility knife and then snapping them off.
If the shim is too thick to cut and snap easily, trim it with an oscillating multi-tool fitted with a plunge-cutting wood blade.
2. Filling Long Gaps with Construction Adhesive
Though inserting wood shins is very useful at stopping the squeaking on the floor, you might come across a long gap running along the length of the entire floor joists.917
It wouldn’t make sense to insert many shims to fill the gaps, crack, or void, but instead, to fill it, you will require a thick bead of fast-set construction adhesive.
You can use a caulking gun to directly force the adhesive into the gap between the top of the joist and the subfloor’s underside.
It’s also advisable to check for gaps on both sides of the floor joists, and you happen to find a crack on the other side of the joist, you can fill it with adhesive.
As the adhesive hardens, it’ll prevent movement on the floor and stop the creaking noise on the floor.
3. Nailing A Board Along A Warped Floor Joist
Floor joists can sometimes twist, warp, bow, or shrink, mostly if they were damp when installed.
Consequently, this results in an opening between the joist and the plywood subfloor.
Whenever a person walks on the floor, the subfloor moves up and down, rubbing against the nails or screws, causing squeaking sounds.
To remedy this problem, you will install a long Douglas fir 2×4 alongside the problem joist.
- Start by applying a continuous bead of construction adhesive along the top edge of the 2×4.
- Press it flat against the joist and slide it up tight against the underside of the subfloor.
- Then rap on the bottom edge of the 2×4 several times with a hammer to ensure it’s tight against the subfloor.
- Afterward, secure the 2×4 to the joist with 3-inch drywall screws spaced no more than 8 inches apart
4. Adding Blocks to Noisy Joists
Another useful and straightforward way to fix squeaky floors is to install solid blocks between the floor joists.
- Cut the blocking from the same size dimensional lumber as the joists. For example, if your home has 2×8 floor joists, cut the solid blocking from a 2×8.
- Cut two or three blocks to fit snugly, but not too tightly, between the two joists.
- Thoroughly spread a bead of construction adhesive along the top edge of each block.
- Evenly space the blocks along the joists’ length and then slide each block up tight against the subfloor’s underside.
- Afterward, fasten the block with 3-inch drywall screws driven through the joists’ sides and into the blocking ends.
5. Driving Short Screws Through the of the Subfloor Floor Bottom
You can stop the movement and eliminate squeaks by driving short screws up through the subfloor’s underside and into the bottom of the finished flooring.
Pro tip: It’s, however, advisable to take care when driving in the nails not to penetrate through the top of the finished flooring.
Otherwise, you’ll end up with a problem much worse than a few squeaks.
To be safe, drive the first screw in an inconspicuous area, like inside a closet, then go up into the room to confirm that the screw didn’t poke through the top surface of the floorboard.
6. Lubricating the Floorboards
It’s an ideal remedy, especially if you don’t have access to the floor joists or subfloor.
When wooden floorboards are causing the noise, add a dry lubricant to the area that you are experiencing the squeaking.
- Start by sprinkling lock lubricant, talcum powder, or powdered graphite into the joints between the floorboards.
- Afterward, place a cloth over the boards and walk back and forth to work the powdery lubricant down into the cracks. Doing so will help reduce wood-on-wood friction between the planks and silence all the squeaking.
- Finally, finish off by cleaning it with a damp cloth to remove any excess remaining powder from the floor.
Note: if the above method doesn’t work, you can try spraying a dry silicone lubricant between the squeaky floorboards. DON’T vacuum clean the powder.
And afterward, wipe off any excess lubricant with a slightly dampened cotton cloth or paper towel.
Read more on How To Fix Veneer That Is Lifting
7. Using a Squeak-Ender
Another effective way to silence floors from below is with a cleverly designed piece of hardware called the Squeak-Ender.
It comprises a threaded rod attached to a flat mounting plate and a steel bracket fitted with a squared-off hook on one end.
- Screw the mounting plate to the underside of the subfloor with the four screws provided. Position it directly under the squeaky spot.
- Slide the bracket over the threaded rod and hook it onto the joist.
- Spin a nut onto the rod, then tighten it with a wrench until the subfloor is pulled down snug against the joist.
- Installation of the Hold-Down bracket, Hold the Squeak-Ender’s steel mounting plate against the joist, then screw it to the plywood subfloor.
- Tighten the nut with a wrench until the subfloor is pulled down snug against the floor joist.
8. Quieting Squeaky Stairs

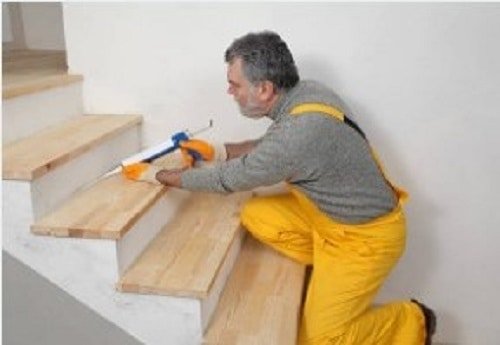
Staircases overtime do start to squeak and creak, these wooden parts expand and contract, and the joints between them loosen up.
Consequently, up or down the staircase, it emits an irritating creak for every step you take.
Fixing the squeaking and creaking for the backside of the staircase
- Look for access to the back of the stairs in closets and the basement; these repairs are the most effective.
- From the rear, insert glue-coated shims into the joints between the horizontal treads and vertical risers. Or, screw wood blocks into the corners where the risers meet the treads.
Fixing the squeaking and creaking for the Top of the staircase
This is preferably best where you can’t get behind the staircase, and you can try either one of these topside repairs:
- Take several very thin wood shims and tap them into any loose or squeaky joints that you find. Neatly trim off the shims with a utility knife.
- The other alternative is to reinforce loose squeaking parts with glue and nail a quarter-round moulding length along each step.
Read more How To Adjust Old Cabinet Door Hinges
Final Verdict on How to Fix Squeaky Floors
A squeaky floor mostly signifies an older house and can be quite a throw-off for many homebuyers.
Well, hoping these straightforward DIYs on how to fix squeaky floors help you in mitigating your floor problems.
In most cases, stopping the friction stops the squeaks and creaks.
This means physically controlling those two elements and preventing at least one of those elements from moving.
Additionally, all floor squeaks can be traced to two flooring elements rubbing against each other, such as:
- Nails or staples that are no longer holding the floorboard and are now rubbing through the hole in the floorboard.
Most creaks in floors can be traced back to this.
- Two floorboards rubbing against each other can produce a momentary creaking sound. Sometimes, the floorboard rubs against another wood element, such as a stud (for perimeter floorboards).
- Subfloor fasteners pulling in and out of the underlying joist can cause the floor to creak.
- Metal ductwork rubbing against the hole in the flooring brings the duct up to floor level. Like other causes, this one is rarer since it is located around the perimeter, where people tend not to walk as much.
- Uneven or bowed joists rubbing against the subfloor can sometimes creak.
Read More on How Can I Determine If A Pressure Treated Wood Is Ready For Staining?
